Step-by-Step Instructions for Applying Kinesiology Tape on the Calf
Kinesiology tape can be a valuable tool for rehabilitation and injury prevention, particularly when applied correctly to the calf. Before applying the tape, it is important to prepare the skin. This includes cleaning the area thoroughly to remove oil or lotion. Use a gentle soap and water mixture, then let the skin completely dry before proceeding. Additionally, trimming any excess hair may enhance the tape’s adherence and effectiveness. Ensuring that the tape will stick during physical activities can prevent discomfort during exercise. To start, measure an adequate length of kinesiology tape. The tape should be long enough to cover the entire muscle belly of the calf as well as a little extra for secure ends. This preparation is essential to achieve maximum support and stability for the targeted area. Furthermore, while cutting the tape, avoid using scissors that can leave jagged edges, as smooth ends will adhere better and reduce the risk of skin irritation. Taking these initial steps will ensure a more effective application process.
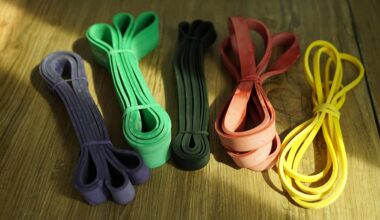
Choosing the Right Tape
When selecting kinesiology tape, consider various factors to choose the right one for your specific needs. There are different types of kinesiology tape available, each designed for varying applications. Selecting a tape with the right elasticity is important as it should allow for movement without restricting blood flow. Look for options that are hypoallergenic, especially if you have sensitive skin. Additionally, consider the width of the tape; a wider tape may provide more substantial support, while a narrower tape can be better for more precise applications. Moreover, colors and patterns are also a concern for some individuals. While the color doesn’t affect the tape’s function, it may boost the wearer’s confidence or aesthetics. Testimonials or reviews from other users can also assist in making the best choice. Sometimes, manufacturers include a guide with their product, explaining suitable application techniques. After selecting the best tape, ensure that it aligns with your activity levels and intended use. Consulting with a health professional can also provide suitable recommendations tailored to your needs.
Next, it’s vital to understand the application techniques for kinesiology tape. One common approach is the I-strip method, which is effective for calf support. First, anchor the tape on the lower part of the calf muscle, securing it without stretch. Gradually extend the tape, maintaining a light stretch towards the upper part of the calf. The last portion should again be anchored without tension to allow mobility. This method mimics the muscle’s natural movement while providing support. Following the I-strip, you could consider the fan method for more complex injuries or areas requiring support in multiple directions. These techniques can help stabilize the muscle during recovery and improve function. Remember to avoid applying the tape around areas with open wounds or infections. Adequate training or practice should go into applying kinesiology tape to reduce the risk of improper application, which could irritate or further injure the muscle.
Monitoring the Application
After applying kinesiology tape, it’s essential to monitor the application for effectiveness. Ensure that the tape remains in place during activity without causing discomfort or restricting blood flow. Observing the tape’s adherence over time will inform you whether adjustments are necessary. Loose areas can be redone or retouched, while overly tight segments should be removed. Maintain an open dialogue with your healthcare provider or therapist, especially during the initial use phase. They can adjust your application technique based on your specific condition and progress. Routinely assess your calf’s response to the tape, noting any pain or improvement in stability. Depending on the feedback, modifications may be needed. Some individuals might also benefit from alternating the application with rest periods without tape to allow the skin to breathe. Consistent assessment can ensure the tape offers the intended support and enhances recovery while preventing further injury. Remember, this holistic approach is beneficial both during rehabilitation and injury prevention strategies.
In relation to the longevity of kinesiology tape, users should be aware that different brands may have varying adhesion qualities. Ideally, kinesiology tape can last several days, even during sweat-inducing activities. However, for maximum effect, proper maintenance of the tape applied is crucial. Avoid soaking the applied area with excessive water. When showering, consider protecting it with a waterproof cover or limiting the duration of the exposure to water. Additionally, patting the tape dry gently rather than rubbing it can help preserve its adhesive quality. Engaging in activities like swimming may cause the tape to lift; therefore, being prepared for reapplication ensures constant support. Before reapplying, ensure that the skin is prepared as specified earlier in the article. Optimal use involves recognizing when the tape should be replaced, ideally once it begins to lose its grip or causes irritation. Maintaining the balance between physical healing and tape application will play a vital role in efficient recovery in the long run.
Common Mistakes
Avoid common mistakes when applying kinesiology tape to yield the best results. One frequent error is not preparing the skin properly before application. As previously mentioned, ensuring cleanliness and dryness is vital. Without proper preparation, the tape is likely to peel off prematurely. Additionally, applying tape with too much stretch can cause discomfort and restrict movement, negating its effectiveness. Conversely, too little stretch may not provide adequate support and lead to inadequate healing. It’s crucial to find the right balance in tension, particularly for areas like the calf where movement is significant. Lastly, many individuals neglect to trim the tape edges, leading to a rough application that irritates the skin. Ensuring smooth edges minimizes discomfort and maintains adhesion integrity. Moreover, always check for contraindications that may affect the use of kinesiology tape based on your health status. Be wary of applying tape over areas that might have fractures or severe injuries without seeking professional advice.
In conclusion, mastering the application of kinesiology tape on the calf involves several considerations, including preparation, choosing the right tape, monitoring its effectiveness, and understanding common mistakes. Remember that kinesiology tape is not a standalone solution but rather an adjunct to a comprehensive rehabilitation program. Regular physical therapy, strengthening exercises, and proper rest are also essential for a full recovery. By following these steps and guidelines, individuals can effectively support their calves, aiding injury recovery and enhancing athletic performance. Always consult with a healthcare professional if unsure about the application process or dealing with persistent issues. Utilizing kinesiology tape correctly can significantly impact mobility and recovery time, making it a key tool in rehabilitation and injury prevention for athletes and active individuals alike.